

How I Maintain Pink Hair at Home
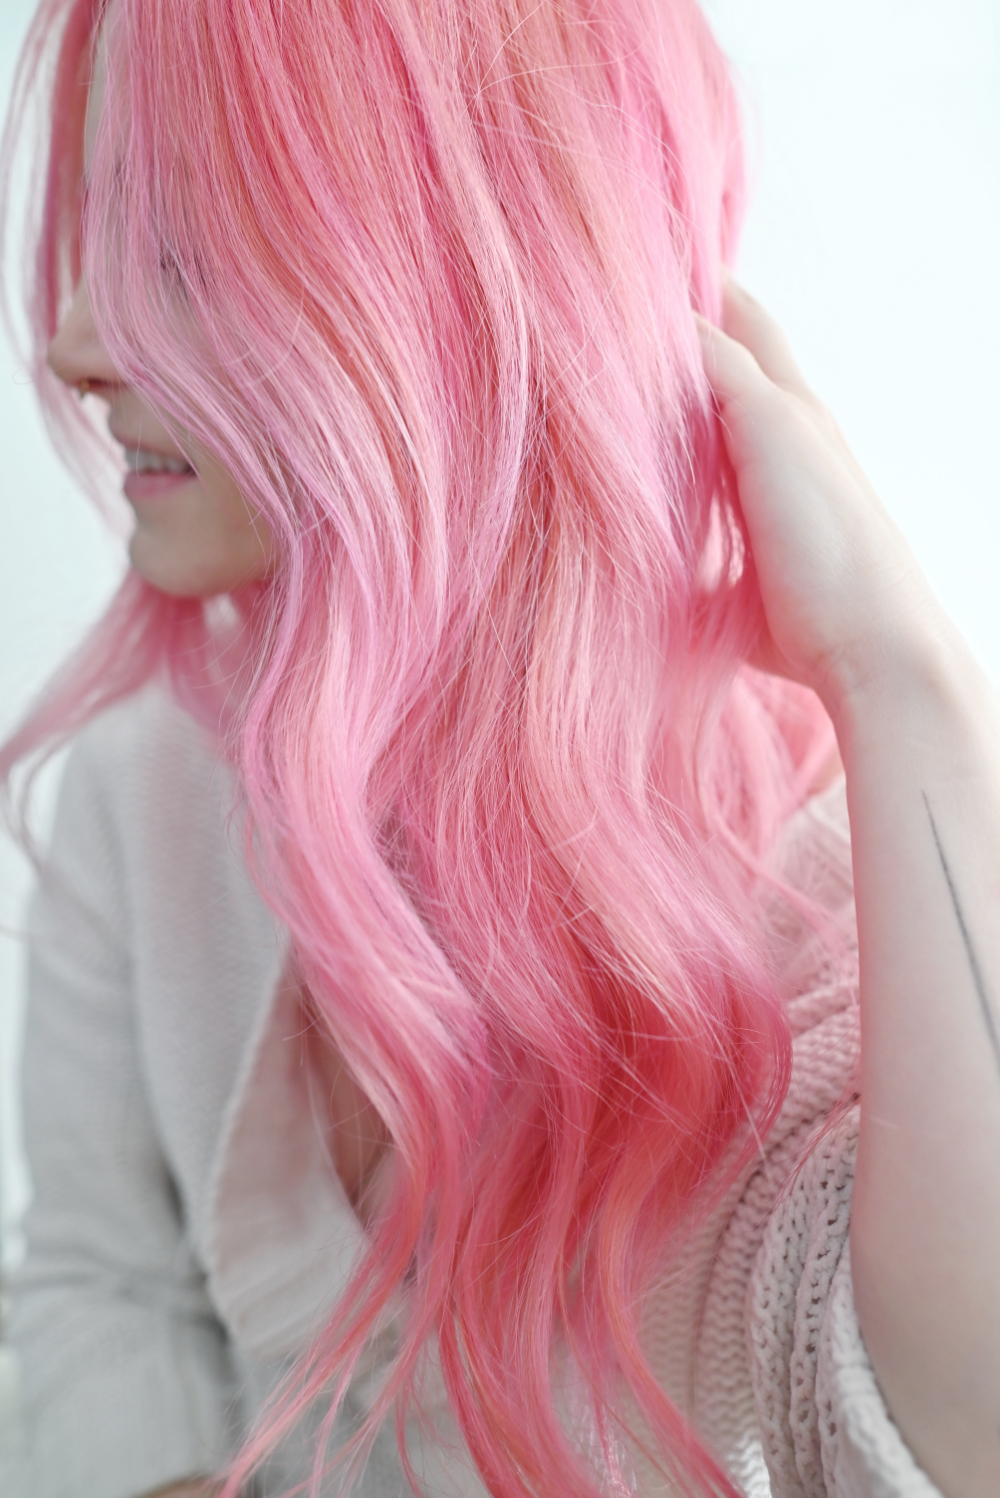
I love my pink hair. It feels more like “me” than any color I’ve had before (and I’ve had almost all of them).
Before I jump into the details, process, and products - I want to specify the most important thing before even beginning down the path of doing your hair at home. You need to know your hair. At home dye, especially bleach, isn’t a whim decision or something to jump into without an understanding of your hair and how it handles chemicals. If you’re even the slightest bit nervous about it, please bite the bullet and go to a professional. I’m not a professional and while I can give my recommendations, I’m giving them suited for how they’ve performed on my own hair. Ok, still interested?
Here’s how I do it.
Step 1: Choose a Color
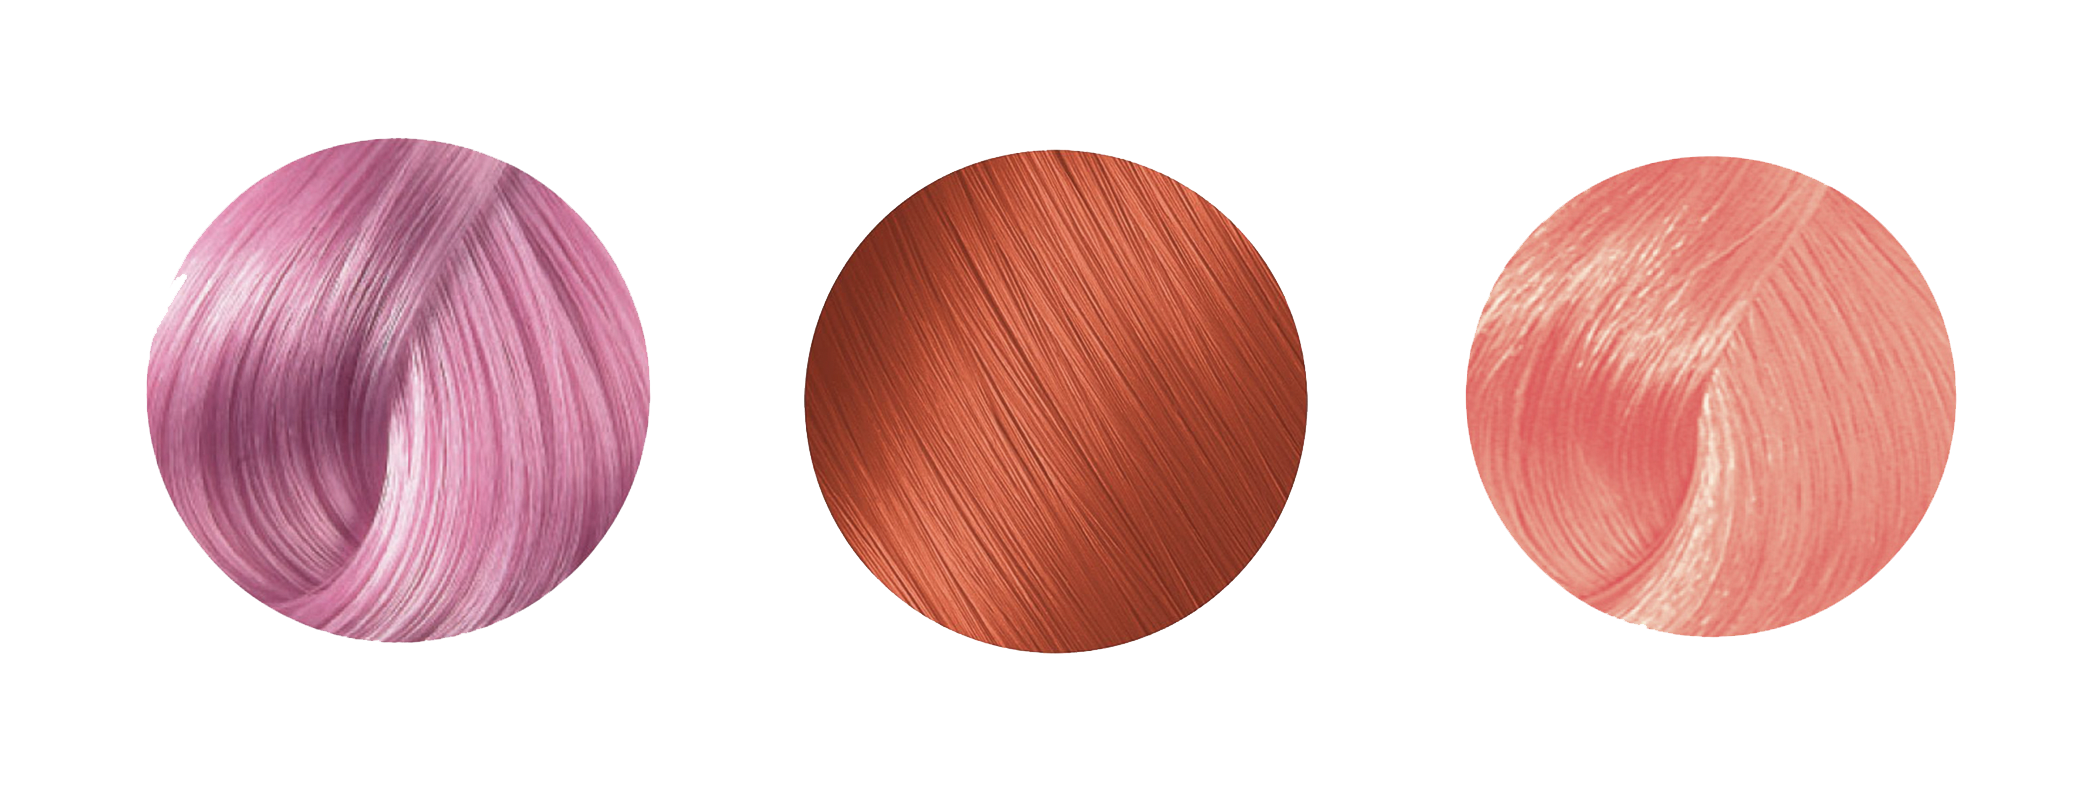
In this case, we’re obviously going with pink. Just as natural colors have nuanced aspects to them, so do unnatural colors. When using pink, for example, there is a long list of shades and dimensions within just “pink.” There’s pastel pink, an icy, more purple shade. You can go a rose gold, which has hints of pink without much color deposit. I usually stick with a pink and mix in orange and corals with it, to keep it on the warm side (so it’ll fade into a rose gold rather than baby pink). Anyway, what shade/color you want will decide what products you use.
Step 2: Get your Supplies
My supplies include the following:
Plastic Walmart Bags (trust me on this one)
Pravana Hair Dye
Shampoo/Conditioner


Supply notes:
There are a ton of at-home hair kits at home, but this one is my favorite. I don’t even have everything included in this photo of what comes in it. It has every supply outside of what you put on your hair that you would need, and comes in a transparent little case. Buy it here and keep it under your counter. I give all of the supplies a good wash afterward and reuse them next time I need to.
For developer, I use a 30 Volume. Again, I know how my hair lifts and you’ll read below how I prep my hair for the products. 20 Volume is a-ok and probably best to start with if you’re unsure of where to start with developer. Resist the urge to think that a 40 developer will make the process faster. 40 is harsh and (imo) shouldn’t be used on your scalp.
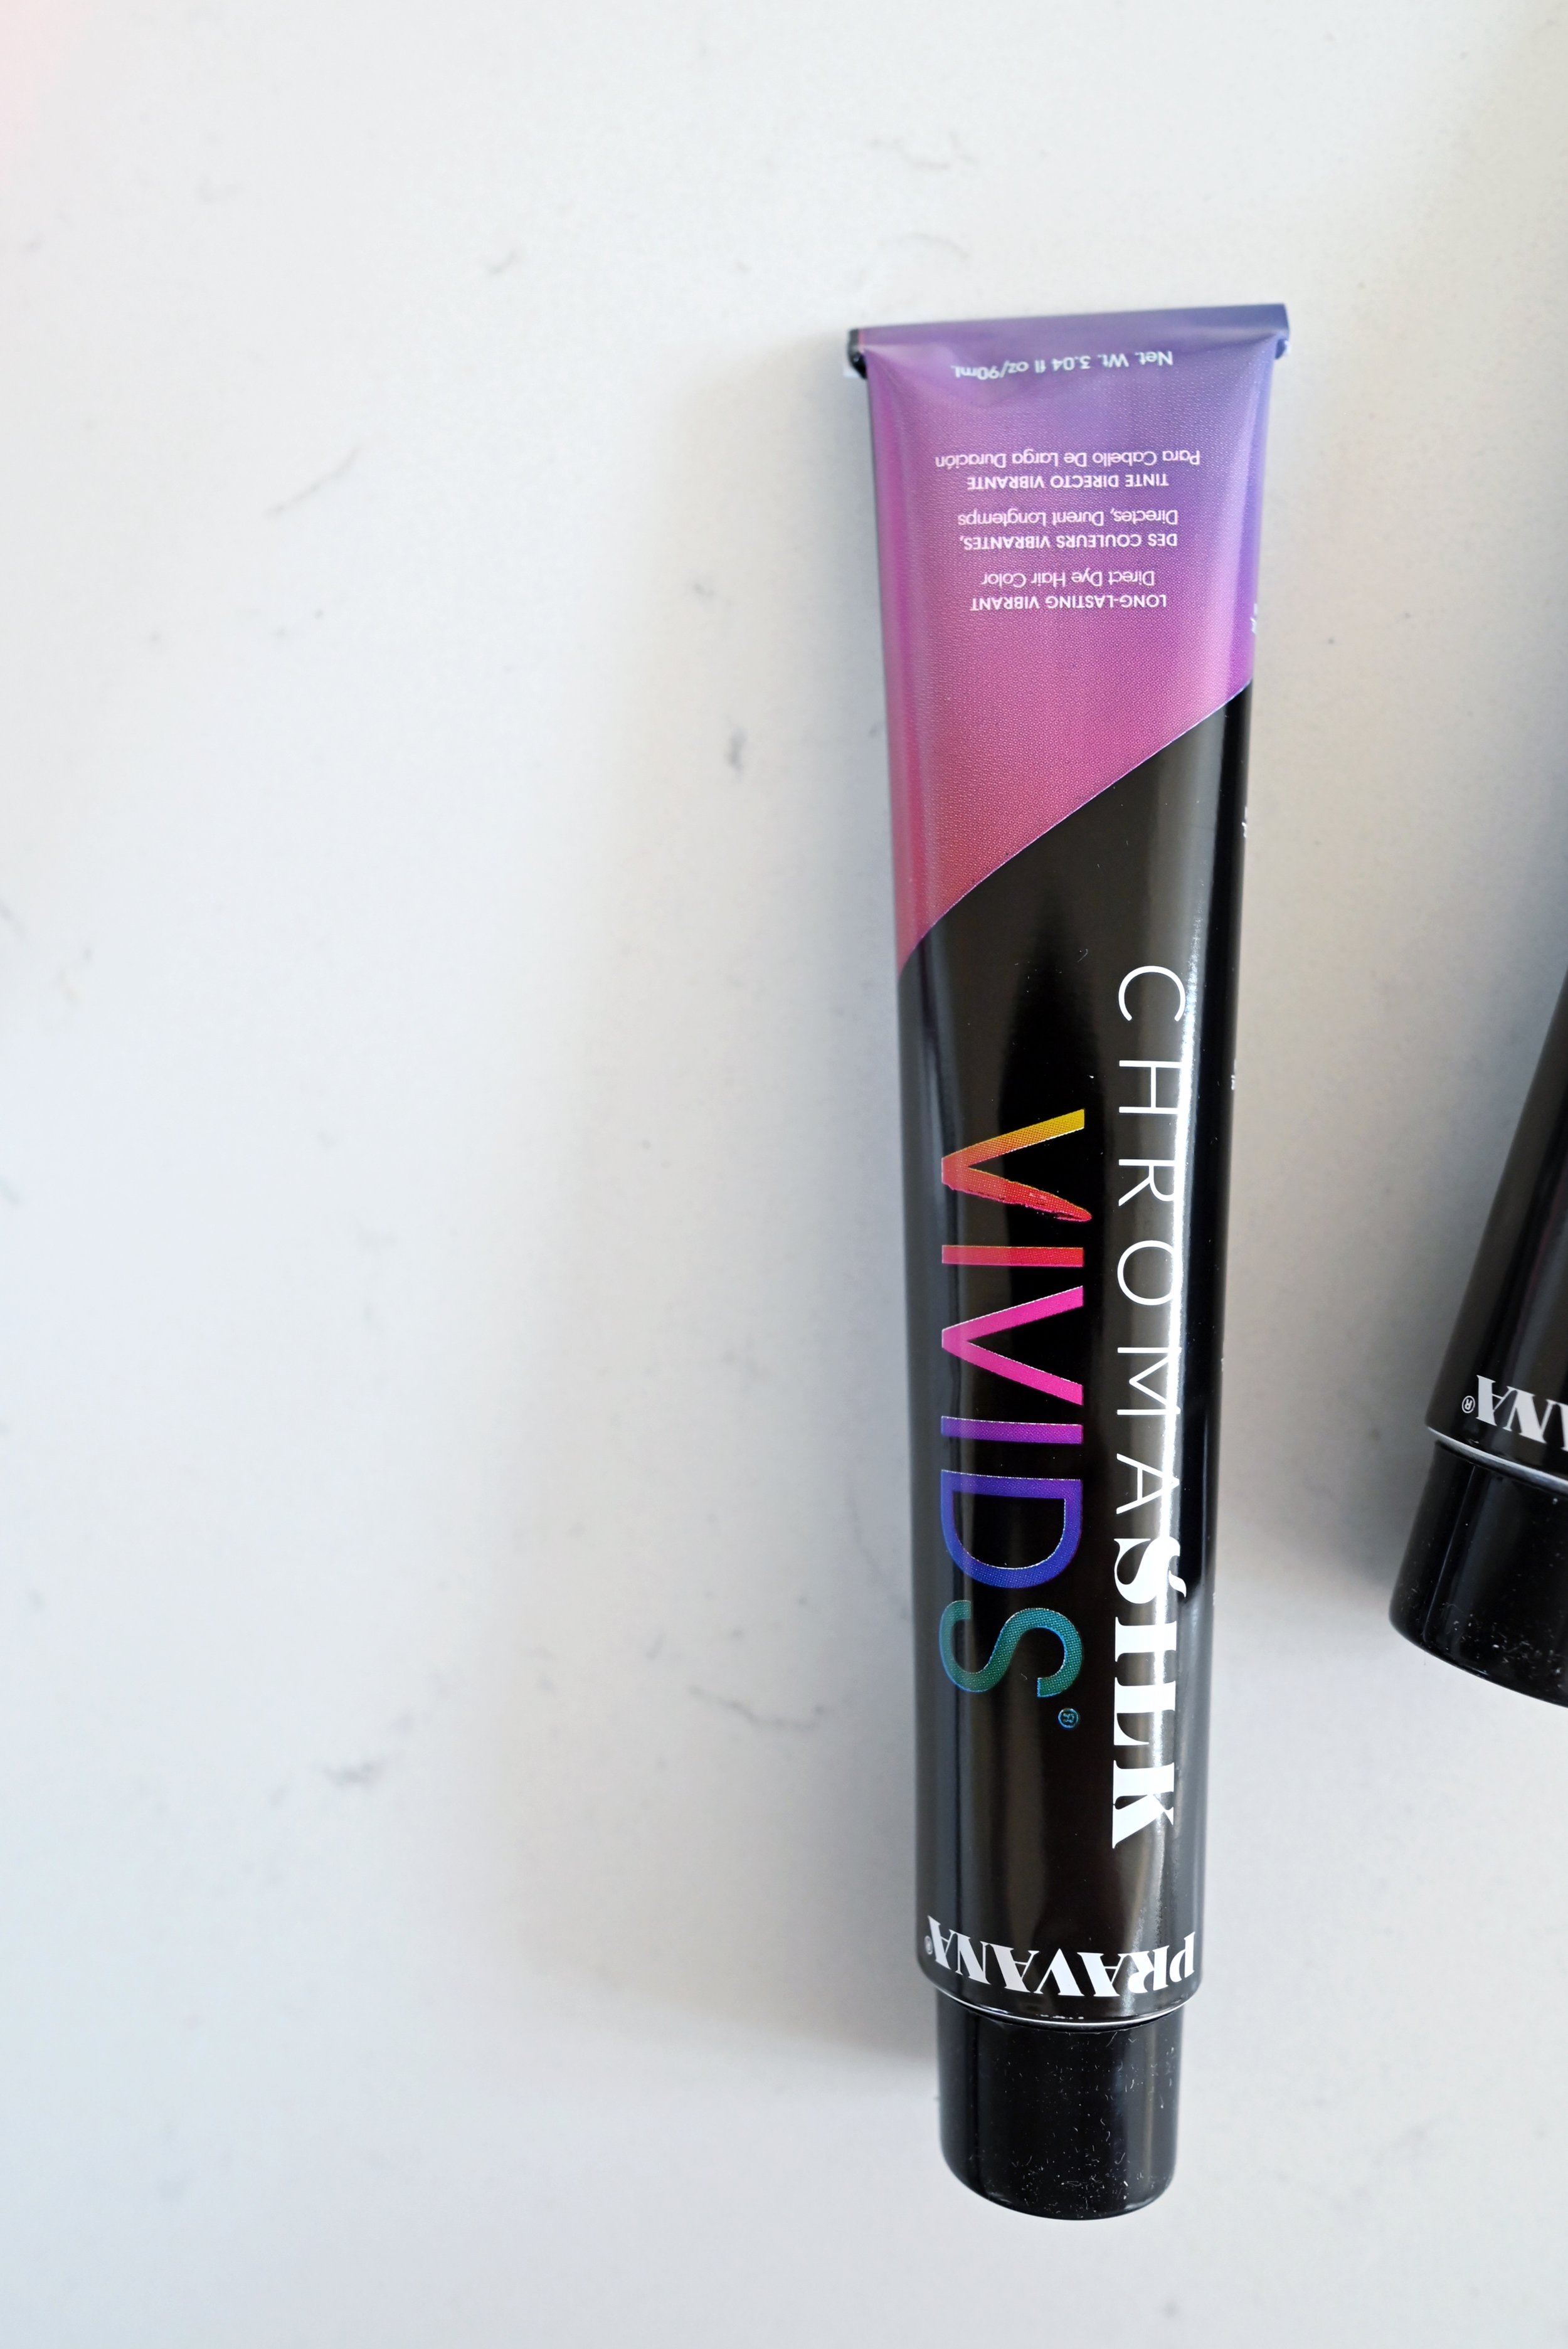
Regarding dye choices, there are so many options for unnatural colors. I personally prefer Pravana because of the staying power. Overtone is a close second. When purchasing Pravana, I buy from Beauty Plus Salon. I’ve found their prices to be competitively affordable and have had excellent service so far from them. The colors included are 3 tubes of Pravana ChromaSilk Vivids Pink, 1 tube of Pravana ChromaSilk Vivids Pastel Too Cute Coral, and a couple squirts of Pravana ChromaSilk Vivids Sunstone. Mixing is fun. You can create whatever shade you’d like.
Step 3: Prep your Hair
Take care of your hair leading up to dye day. Let some natural oil build up and don’t wash your hair for a couple days before hand. Wear a hat if you must. Because bleach can be harsh, I do a deep conditioning hair mask a few days ahead and even apply a little coconut oil to my scalp the night before. On the day of, brush out your hair and use the clips in the kit to section off your hair. I follow my middle part down through the back of my hair and then split again horizontally. This gives me a half-up space buns look for a bit and has me always considering if I should do it more often (or ever) outside the house.
Step 4: Mix your Bleach
Next, I mix the L’oreal Paris Quick Blue Powder Bleach and the Clairol Professional Pure Developer at a 1:1.5 ratio. This means for every scoop of powder bleach, I do a scoop and a half of developer. I let my roots go pretty far so I used more than I hope to in the future. Use however much you need. Personally, I think it’s nicer to make more rather than run out and need to mix more mid-process.
Step 5: Apply Bleach and Let Process
Apply the bleach to your roots. Wear your cover, gloves, and have your hair separated. I start in the back of my head going in a cross formation down and across. I do this mainly because it processes quickly and I’m able to have Kyle come in and clearly eye down if I’ve missed any spots. Once I’ve confirmed I' have covered all the areas I want, I wrap up into a hot mess of a bun on my head and here’s where it gets classy - break out those plastic shopping bags. Sure, you can use shower caps. You can use processing caps. I’ve had just as great results from allowing processing in a plastic bag. Flip that bag over your head (obviously not on your face) and tie/twist just under your hairline on your forehead. Because I use 30 Volume, I let this sit for 10 minutes.
Step 6: Wash out the Bleach
However you wash your hair (I go old fashioned and jump in the shower), go for it. This is a deep wash. You’re not just casually shampooing. You’re breaking up pockets of bleach processing in your hair. I do this essentially with an intense head/scalp massage under the water. Shampoo next. Personally, I shampoo twice with my regular, non-color depositing shampoo. I follow with conditioner for the sake of being able to untangle and easily brush through my hair.
Step 7: Dry
I personally don’t blow dry my hair, so this is the longest step. I air dry every time and this is no different. I don’t include normal leave-in products during this step so that the pink can hold onto my hair with no issue.
Step 8: Prepare for Pink
Once my hair is completely dry, I brush through and section it off again with the same (washed) clips. I mix up my pink shades. Blending these colors together smoothly is important so that there can be a cohesive color result. I get my favorite hair coloring shirt and cover back on, and get to work. This is another area where you don’t want to run out mid-way through application, especially if you’re mixing and not keeping note of ratios (aka me, every time).
Step 9: Apply Evenly
I apply the pink all over my hair, starting from the root and working it into the hair. It will always look a little brighter on my head at this stage because it’s a color on a blank canvas of sorts. Don’t let that vibrancy scare you. Once application is finished, I grab those plastic bags again and double bag it. While directions recommend leaving at room temp for about 30 minutes, I usually sit back (carefully) and enjoy a show. Most recently, we watched an hour long show. So, I usually go over the 30 minute mark with no issues.
Step 10: Wash the Dye out
Repeat the same process as the bleach, making it another scalp massage sort of shower. The dye washing out will have the feel of conditioner. I personally use a rose gold color depositing shampoo and conditioner at this point in the process, but as a last attempt to keep my hair from being on the purple side of pink. You can choose to use any shampoo/conditioner you want or skip that step completely and simply heavily rinse the color out.
Step 11: Show it off!
One of the great things about having an unnatural hair color is that no one can tell you what you were going for. Even if the result is too bright, faded, light, dark, etc. - no one knows. For all anyone knows, you nailed every bit of it and this is the most perfect hair you’ve ever had. No matter what, go out and be confident in your bold color and statement hair!